🔒 Disable LLMNR and NetBIOS on Windows
By default, Windows ships with insecure legacy protocols like LLMNR and NetBIOS enabled. These protocols can leak username and password hashes over the network and are often abused by tools like Responder.
Disabling them significantly reduces your attack surface.
🛑 Disable LLMNR (Link-Local Multicast Name Resolution)
🔧 Option 1: Using Group Policy (for Windows Pro / Enterprise)
- Press
Win + R, typegpedit.mscand press Enter - Navigate to:
Computer Configuration > Administrative Templates > Network > DNS Client - Double-click Turn Off Multicast Name Resolution
- Set it to Enabled
- Click OK
🔧 Option 2: Using the Registry (for Windows Home)
-
Press
Win + R, typeregedit, press Enter -
Navigate to:
HKEY_LOCAL_MACHINE\SOFTWARE\Policies\Microsoft\Windows NT\DNSClientIf the path doesn't exist, create it.
-
Create a new DWORD (32-bit) Value:
- Name:
EnableMulticast - Value:
0
- Name:
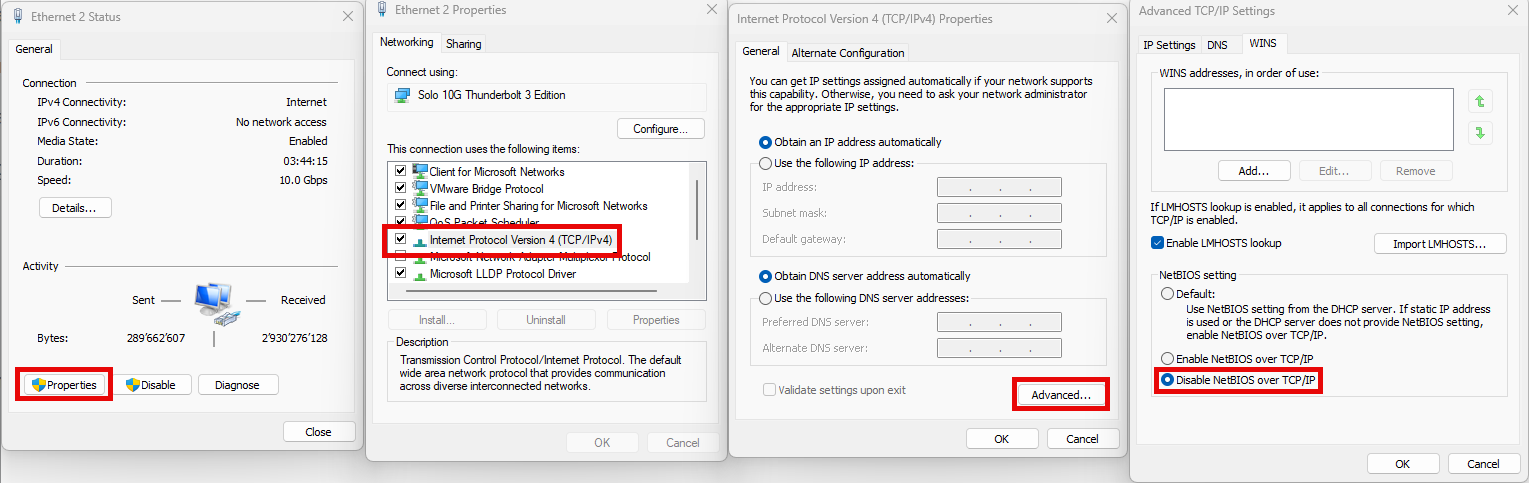
🛑 Disable NetBIOS over TCP/IP
- Open Control Panel → Network and Sharing Center
- Click on Change adapter settings
- Right-click your active network interface → Properties
- Select Internet Protocol Version 4 (TCP/IPv4) → Properties
- Click Advanced → Go to the WINS tab
- Select: Disable NetBIOS over TCP/IP
- Click OK → Apply the settings
🔄 Reboot
Restart your machine to apply all settings.
✅ Verification
LLMNR status via PowerShell:
Get-NetAdapterBinding -ComponentID ms_llmnres
The output should show
LLMNRis unbound/disabled.
NetBIOS status via Command Prompt:
nbtstat -n
Should return: "No names in cache" or empty output.